
티스토리 뷰
모바일/iOS
XCode4: Interface Builder에서 UITabBarController 에 UINavigationController 올리기
공허공자 2012. 1. 15. 21:22원본링크:
XCode4: UITabBarController with UINavigationController using Interface Builder
1. 새 프로젝트 생성
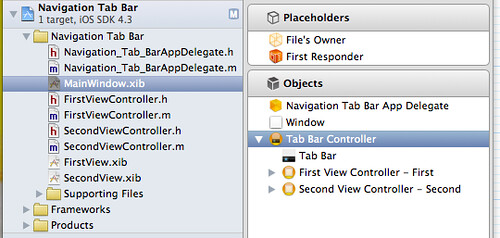
Tab Bar Application 으로 시작합니다.

2. 탭바 선택
MainWindow.xib 클릭하고 통합된 Interface Builder 왼쪽의 Objects 구역에서 Tab Bar Controller 선택.
3. Navigation Controller 추가
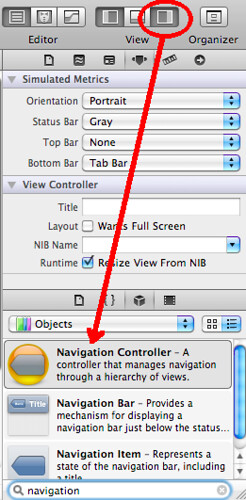
화면 오른쪽 구석에서 Utilities box 클릭하고 Navigation Controller 찾아서 Tab Bar 중 중간 탭 안으로 드래그.
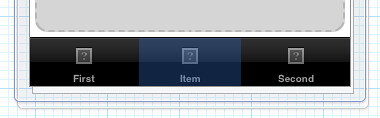 |
| 중간 탭으로 추가한것을 보실 수 있습니다. |
4. 새 탭 설정
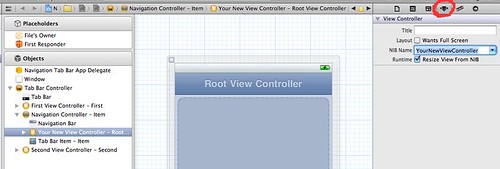
Objects section으로 돌아가서 Navigation Controller 확장하고 View Controller 선택. 오른편 상단에서 Identity Inspector 선택하고 UIViewController의 클래스명을 입력. 이 데모에서는 "YourNewViewController"로 입력한다.
Attribute Inspector로 전환하고 NIB Name 부분에 XIB 파일명 입력.
주: .xib 확장자는 입력하지 말것, runtime crash를 유발함.
주: .xib 확장자는 입력하지 말것, runtime crash를 유발함.
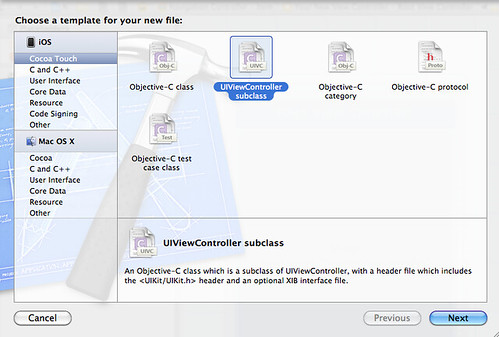
5. 새 UI View Controller 생성
File 메뉴에서 파일 생성하고 UIViewController subclass 선택.
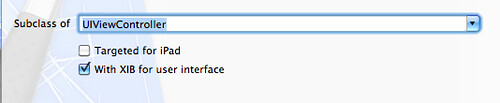 |
| With XIB for user interface 선택하도록 한다 |
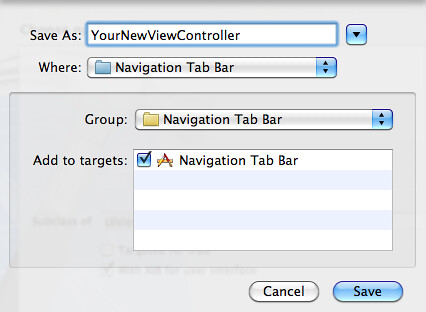 |
| 이전에 쓴 파일명과 같게. |
6. IBAction 추가
navigation controller에 뷰를 올리기 위해 버튼을 추가할것입니다. header 파일을 열고 action 추가.
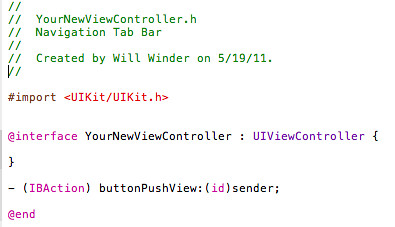 |
| buttonPushView 줄만 추가됨 |
implementation 파일로 전환하고 pushViewController를 호출하는 몇줄을 추가.
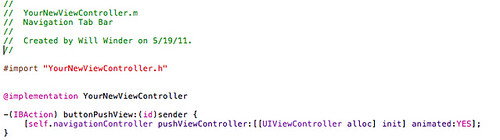 |
| This is the simplest pushViewController line I could come up with |
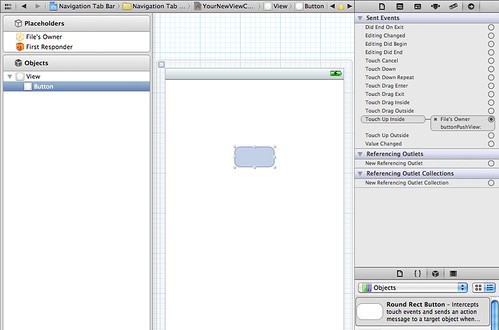
7. 버튼 추가
파일메뉴에서 YourNewViewController.xib 선택. 버튼 추가는 오른쪽 아래 Objects 구역에서 버튼 선택하여 뷰에 드래그/드롭.
다음은 버튼 오른쪽 클릭하고 Placeholders 구역의 File's Owner로 드래깅 후 buttonPushView 선택하여 버튼을 IBAction에 연결.
다음은 버튼 오른쪽 클릭하고 Placeholders 구역의 File's Owner로 드래깅 후 buttonPushView 선택하여 버튼을 IBAction에 연결.
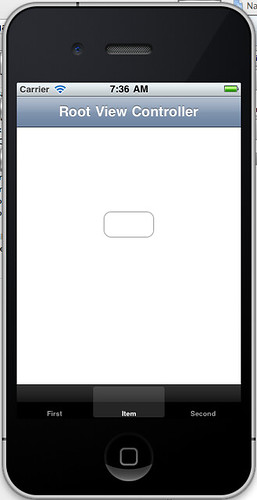
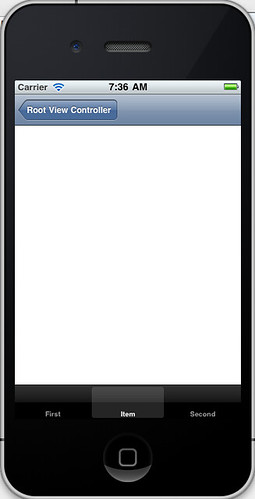
8. 끝!
이제 빌드하고 실행 (Command-R). 두번째 탭을 선택하여 추가한 Navigation Controller를 확인하고 버튼 클릭후 행동을 봅시다.
'모바일 > iOS' 카테고리의 다른 글
| iOS: javascript confirm 같은 모달대화상자 구현 (0) | 2012.01.15 |
|---|---|
| 뷰(xib) 모달창으로 띄우기 (0) | 2012.01.15 |
| XCode3: 뷰의 추가 (0) | 2012.01.15 |
| 소스에서 인터페이스빌더에 올린 오브젝트들 참조하여 컨트롤 (0) | 2012.01.08 |
| iOS 레퍼런스 접근시 You do not have access...membership 메세지 (0) | 2012.01.05 |
댓글
최근에 올라온 글
최근에 달린 댓글
- Total
- Today
- Yesterday
링크
- Make Use Of
- How to geek
- 인터넷 통계정보 검색시스템
- 트위터 공유 정보모음
- 웹표준KR
- 치우의 컴맹탈출구
- Dev. Cheat Sheets
- w3schools
- Dev. 조각들
- ASP Ajax Library
- CSS Tricks
- WebResourcesDepot
- jQuery Selectors Tester
- DeveloperSnippets
- Smashing Magazine
- Nettuts+
- devListing
- 웹 리소스 사이트(한)
- Mobile tuts+
- Dream In Code
- Developer Tutorials
- CSS3 Previews
- 자북
- 안드로이드 사이드
- Code Visually
- Code School
- SQLer.com
- 무료 파워포인트 템플릿
- iconPot
- Free PowerPoint Templates
- Design Bombs
- Web Designer Wall
- 1st Webdesigner
- Vandelay Design
- 무료 벡터 이미지 사이트들
- Tripwire Magazine
- Web TrendSet
- WebMonkey
- 윤춘근 프리젠테이션 디자이너 블로그
- cz.cc 무료 DNS
- [웹하드] MediaFire
- [웹하드] DivShare
- 한컴 인터넷 오피스
TAG
- sencha touch
- Chrome
- Android
- 워드프레스
- IOS
- mssql
- JQuery
- API
- Prototype
- centos
- 한글
- Linux
- PHP
- Mac
- IE
- JSON
- javascript
- ASP
- iis
- nginx
- nodejs
- Wordpress
- Docker
- iphone
- git
- laravel
- CSS
- Debug
- 안드로이드
- classic asp
| 일 | 월 | 화 | 수 | 목 | 금 | 토 |
|---|---|---|---|---|---|---|
| 1 | 2 | 3 | 4 | 5 | 6 | |
| 7 | 8 | 9 | 10 | 11 | 12 | 13 |
| 14 | 15 | 16 | 17 | 18 | 19 | 20 |
| 21 | 22 | 23 | 24 | 25 | 26 | 27 |
| 28 | 29 | 30 |
글 보관함